Will I ever learn to lock the sewing room door.....

When concentrating on cutting?  Probably not!

Because I am in-between FW installments, I have decided to do a mystery quilt from one of the FB groups that I read.


I ordered the Jelly Rolls, Fusions Meadow and Kona Black and waited for the first clue to be released.

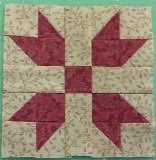
Well, it came out with three different sizes that you can make, I chose to do the 58 x 78 as my quilt frames are not set up to handle anything more than 72 inches.  The fabric requirements for this size are perfect for these jelly rolls and if you want to make it bigger, a couple of additional strips are needed from both the Kona and the Fusions, so I'm good... so I think.

So I take the pattern cutting instructions with me on the field trip, so I have something to do while I wait for the track team to come back to the bus.  I sat and figured and figured and yup, no matter how I tried, I was coming up needing 1 additional black strip, the fusions was just the right amount, I thought.

Well, this is where it pays to write things down when you get to my age, like why you only purchased what you did.  I purchased for the 58x78 not the 78x78 quilt! I was reading and figuring for the larger quilt (Idiot!) So this morning, I decided to get to the cutting board and get this 1st step completed.   Cut the Kona, no problems, was able to use my Accucut to make the mound of 2 1/2 squares and so I was happy, went quick and I had the right amount of fabric because I always have Kona black hanging in the stash.

Now comes the Fusions.  I only have the one, no extras, no charm packs or layer cakes, just the one Jelly Roll.  I like extra fabric, but I am taking a gamble that I will not have to redo anything and need to re-cut.

So I start cutting, all is good.. cutting, cutting, cutting.... husband... cutting.. CRAP!

I was almost done and I stopped to talk to my husband and put 6 strips, that were supposed to go in one stack be cut into 6 1/2 sections, in the 2 1/2 stack.  You guessed it, I cut them in to 2 1/2 sections, looked down and about cried!

Remember where I said I thought I had enough fusions fabric?  The instructions say that you need additional 2 strips to cut into 2 1/2 squares.  Ok, so I went to my favorite web site and ordered a charm pack, that was before I started cutting into Fusions JR.  So now I have mis-cut, my biggest fear, so I go back to the web site and start looking at layer cakes... wait a minute, I can get the missing 2 1/2 squares and the mis-cut 6 1/2 strips out of another jelly roll.  Because today is Sunday, my order was still pending for the charm packs, so I canceled that order and ordered the jelly roll.

I put everything into the tote to keep the cat fur off, I turn around and on my desk is the cutting
instructions for the 58 x 78 size, the one that I bought the jelly rolls for in the first place.  I start reading, counting and have a sigh of relief.  Not only do I have enough, but I have too many!  Yeah.. oh no, I ordered another jelly roll, so back to the web site and canceled that order as well.

So in the end, will I learn to lock my sewing room door?  No, will I learn to read twice and cut once? No.... Am I done for the day?  Oh Yeah!

Till next time,


FW Progress Blocks 21-30 (class 3)

Ever have one of those days that you just didn't feel like doing anything but sitting?  Yup, me to and that was today, the last day of spring break. I have to go back to work tomorrow and I don't want to go!

When I bought this computer, it came with a new OS, Windows 7.  Not really having the time to re-create Windows 98, I pretty much left the file structure as it was set up . . .  for dummies, 'till today.

Today, I really started looking and comparing files and saw that there were 3 file structures, Favorites, Desktop, one with my user name on it.  ALL three of these files had the same folders as the ones that are in the C: drive.  WHY?  I still don't know, but as of 10 this am, all of the excess file folders are gone and no more 'shortcuts'! Seams the bigger Microsoft gets, the dumber they think we get!

I started to look at this blog.  Being new to me, I stared to explore the buttons and settings.  You will notice that the blog has a new look, new colors and a few optimizations.  I also did not like the way that the FW blocks were looking in each blog, taking up to much room and I really had no control of where they sat on the page, so I figured that I could use a table to 'organize' a little.  It worked!  You will see below just what I mean.

Yesterday, I saw that someone had created portable design boards (the link is on my links page)  Looked pretty easy to do, and I was right!  Went to Wallie World and picked up a couple sheets of foam core board, cut them to the size I wanted, looked in the stash and found a couple of 2 1/2 strips and half hour later, this is what I ended up with.  They work great with my FW blocks, just the right size.

Speaking of FW Blocks, I ripped apart the one that I had sewn together backwards and reassembled it.  I had sewn the right to the left and left to the right.  All fixed now.  Here are my blocks 21 - 30 for the Farmers Wife Quilt.


 Happy Quilting!


The $50 dollar idea

No sewing today, after the disaster that I made last night,  The picture of the block the way it is supposed to look on the top.  The block that I put together on the bottom.  My dish really is broken on this one!

I figured it was time for a break, so I went shopping!

 A little background story:

I have a nice size studio (the master bedroom of the house, don't ask how I managed that one) but almost everything in it is custom made, simply because it is cheaper and I can get just what I want.  I can conceive and my DH can construct.  I like to re-purpose items, say if they were meant for one thing, I will find another way to use them for my needs in the studio.

 For instance, my sewing table is made out of a 1/2 inch 4 x 8 sheet of MDF.  We had to slice it down the center to get it home (because we didn't have truck at the time) but that was a good thing because it took two strong men just to get one half of this sheet up the stairs.  MDF is really heavy!

I have 3 bathroom cabinets from way long ago, and I use them as base units for my sewing table.  They have, up until this move, been attached to a wall with a kitchen counter top attached to them.  Now that I have a bigger space, I can have a bigger table, makes since to me!  So what you see here is the base of the table.  I wanted electric added to it, so my DH, being my DH, went overboard on the request and wired me 2 four outlet plugs on one side and 2 four outlet plugs on the other side so when I have friends over, they also can plug in anything they want.

The center piece also acts as a stabilizer so this table doesn't move and can support the weight of a baby elephant!! (over kill?  Yup, you bet'cha!)


So here is the table with half of the sheet of MDF.  It is attached to the center bar, which my DH cut the corner off so I could save my knees, with screws and angle hardware.  This top is not going anywhere.


And here is the semi-finished table.  Screwed on so tight, I almost didn't need to find a leg for that missing cabinet (see the empty space   ------------------>)

Without even asking if I wanted the corners rounded, my DH got out his router and saved my legs from multiple bruises!  Isn't he nice?


So when all is said and done, I have a nice big sewing table that I can iron and cut on.  I covered it in duck canvas with two layers of warm and natural underneath and it is a beauty!


Like I said, I like to re-purpose things.  Next on the list is my ironing board.  A long time ago, when the big board iron board was introduced, I said to myself  "I can make that for less than $25 dollars, why pay $xxx for this?"
This is what I came up with.  It is a wire shelf I found at IKEA covered with several layers of batting and an old bath towel covered by reproduction feed sack cloth (uckie stuff to sew with but wonderful to cover stuff with)  I attached it to the top of my ironing board with a couple of screws and Wholla! my version of the Big Board for under $25 dollars!  Not bad, but a little unstable if you lean on it.

Storage and shelves have always been a problem in my studio.  Never enough of either, or maybe just to much stuff.  Which brings me to the subject of this blog, The $50 dollar idea.

 I was reading a post on one of the groups I belong to on FB.  They were showing off their new ironing tables.  Humm, ironing table, not board.  They were showing beautiful, expensive base cabinets, lovely really, but way outa my budget, so I started to think, can I make something like this for way less?  Yup, sure can, but how?  Stared with the IKEA catalog, then Amazon, then Walmart on line.  Got some great ideas, but settled on IKEA.  I went shopping and here is what I found.

It is a galvanized shelving unit, 36 inches tall, 14 inches deep and 19 inches wide. Perfect, I'll take 2, one for each side.  The table I have now is 33 inches tall, so 3 more inches is not bad.  The top is 22 inches wide underneath so the 19 inches is perfect.  So here is what I managed to create with two units:

Took me all of 30 minutes to put them together, no tools, remove the ironing surface and set it on the shelves.  I have attached the units to the table with the straps they provided and it is super solid and I gained a small amount of storage space, and 6 inches of floor space as the table is over an unused end of the sewing table. Water is not longer on the floor, scrap bucket is no longer in the corner and DH is happy with the 'upgrade'.

So that was my $50 idea for the day.

Happy re-purposing!


FW Progress - Blocks 11 - 20 (class 2)

From Mary Poppins - These are a few of my Favorite things...... I thought you would like to see some of the things that I love to sew with and why I like to sew with them.


My sewing machine.  She is a Brother Innov-is 1000 or in plain language, a Brother Quilt Club. She only sews, no embroidery.  She is a workhorse, smooth, quite and dependable!


Basic sewing tools, yes, tools.  Without these (and a handful of rulers) quilting would no be as enjoyable as it is now.

I love Ginger scissors.  The pattern on the handle of both the embroidery and 8 inch dressmakers shears, is the American Flag. 

There is a new style Olfa cutter with the easy release blade feature (nice!) 

The precision Trimmer 6 inch by Marsha mcCloskey is really a 6 1/2 square, perfect for the FW blocks and the rotary cutting mat, wouldn't quilt without it!

My favorite stiletto and seam ripper. The handles are turned acrylic by a man that I found at one of the sewing shows I went to earlier this year.  Bought the one on the right a year ago and even though the ends are interchangeable, it was bothersome as I use both tools, the ripper to cut the threads in-between chain pieced parts and the stiletto to guide the fabric under the presser foot.

You say you don't use a stiletto?  Why not?  Do you use the point of your seam ripper? Not good.  Do you use your fingers? Not good.  Simply stated, a stiletto will help hold those little ends straight when you feed them into the needle are where your fingers can't and shouldn't go.


OMG, I have been digging out notions that I had forgoten that I had.  You know when something new comes out and you just have to have it?  Well, this is what I said when this Mini Iron II came out.  I already had the first version, why have the second?  Well look at all of the tools it comes with!  The one that I am finding the most handy is the large end.  It gets hot enough to do a basic press, like pressing blocks open before the next step, and it saves me getting up and down to go to my steam iron (which I do use as the final press)


Look at the picture of my machine.  It is sitting on a custom made table.  My DH made it for me and I covered it in two layers of warm and natural and one layer of pretty duck canvas.  I did that so I could iron on, smart huh?


Do you use a Startie/Stopie?  A what you say?

This is a little piece of scrap fabric that you feed under your presser foot, take a few stitches to secure the thread and then start sewing on your block.  This helps keep the thread from pulling back, keeps the little ends from ending up as lint in the bobbin area and in general, helps feed things smoothly into your machine.  I use them till I cant stand them any more and start another one. These are just a few from the first 20 FW blocks.

So what have I learned today?  I really don't like 6 inch blocks, or at least the 6 inch blocks that have 1 1/2 inch pieces.  The seam allowance is almost as big as the piece you are working on, thank goodness, I am thinking about sending this one out to be quilted.  I can only imagine what it would be like to quilt over all of these little seams!

So here is my progress for today, the next 10 Farmers Wife Blocks:


Happy Farming!


Cutting, Cutting and more CUTTING!

OUCH!  My back is on fire!  Standing at the cutting board (which is the correct height for me) is killing my back.  I have 4 more blocks to cut and then I can sit an sew for a while.

Here is what I have done so far today:
1. Finished putting month 2 & 3 instructions in the 'notebook'.
2. Pulled a few more fat quarters, pressed and got them hung with the ones that were running low.
3. Pulled all of the fabrics for the blocks for classes 2 & 3.  Did a good job keeping the blocks random fabrics.  Only had 3 that I had to use twice in the 1st 30 blocks.
4. Cut, cut, changed the blade in my rotary cutter, cut, cut cut.
 (The pages on the left have all of the cut fabric for the blocks and the ones on the right are to be cut).

Learned that, although I have been quilting for more than 30 years, my measuring skills were week.  Not any more!  1/2 and 3/4 are easy, but these blocks are 3/8, 7/8 and 11/16!  16th, really?  that is like 4 threads... BUT I cut it as the instruction say.

Click on the picture for a close-up of the red line.  That is a 16th of an inch mark, seriously, 4 threads!


If you are like me, I can not concentrate with the TV on.  Either it is just babble that is distracting or there is really something on and I start to watch and get distracted.  I did a search for FREE radio stations on the internet and came up with Live 365.  Totally FREE.  You can subscribe to get rid of the commercials, but the commercials that come on are so minor, why bother.  Up to 30 minutes of uninterrupted
music.  I like classical, and there is a channel that is 100% Mozart!  Put it on low in the background and it is just enough to make the time pass.

So enough for this break, back to the cutting board....


FW Progress - Blocks 1 - 10 blocks (class 1)

When I create a Mystery Quilt, I often create a page for the quilter to put snips of the fabric that will be used in the creation of the blocks.  This keeps everything organized (hopefully).  So when I started this quilt, I figured that I needed something to keep all of the instructions and the fabrics together in one place.


Knowing that I have the picture of the block, that I have colored in EQ7 with the actual fabrics I am using, the cutting instructions and sewing instructions from FWRQ,  the fabric with the manufacturer number that I needed to match up with the instructions, I had to have something that I could write on and glue to.


So off to Wallie World I went, looking for composition books, you know, the little black books that are used for notes and doodles when in school.  I found that they now make them in graphic squares, I like graphic squares, especially when designing quilt blocks.


They also have vinyl covers for these books that you can put your pencils and pens in to keep everything in one place.  I thought, great, someplace to keep the templates, sold x 2


So with a little clicking and a little printing and cutting, I ended up with this, the cover from the book is now the cover for my notebooks, yes, books, because it will take 2 notebooks for all 12 lessons and notes. 


Here are Blocks 1 - 10 of the Farmers Wife Quilt Revival


I did learn something, and I hate to admit it, but I have been using fabric from Joann's for so long, that the settings on my machine were quite a bit off.  I have an instruction sheet on my web page that shows you how to adjust your machine for that perfect quarter inch.   "Where is your quarter inch?"  I should have done the exercise using this fabric.

A long time ago, I gave up the use of the quarter inch foot, I found that it would only use 1/2 of my feed dogs and that I was not getting the consistency that I wanted.

I went back to my regular straight stitching foot and now move my needle to the right and use the edge of the foot to achieve that perfect scant quarter inch. If you watch any quilting instructor, look closely at the foot they are using on their machine, is it the quarter inch foot?  Nope it the Zig-zag foot.

This fabric, well, is Quilt Shop Quality Fabric, the good stuff!  What I have been using is, well, not the good stuff.  I sewed my first 2 blocks together and they both came out 1/4 inch smaller than the perfect 6 1/2 sq.  I moved my needle 1 click to the right and wholla, perfection!

What happened is that because the fabric is better quality, it is thicker, it takes up more in the turn of the cloth.

What does "Turn of the Cloth mean?

What the “Turn of the Cloth” refers to is this:  When you sew and then press a seam, the fabric that folds over or ‘turns over’ the thread is called ‘turn of the cloth’.  Depending on what thread you are using and what the thread count of the fabric you are using, this turn could be 1, 2 or as much as 3 threads or more. (thank you college education)

Happy Farming!